

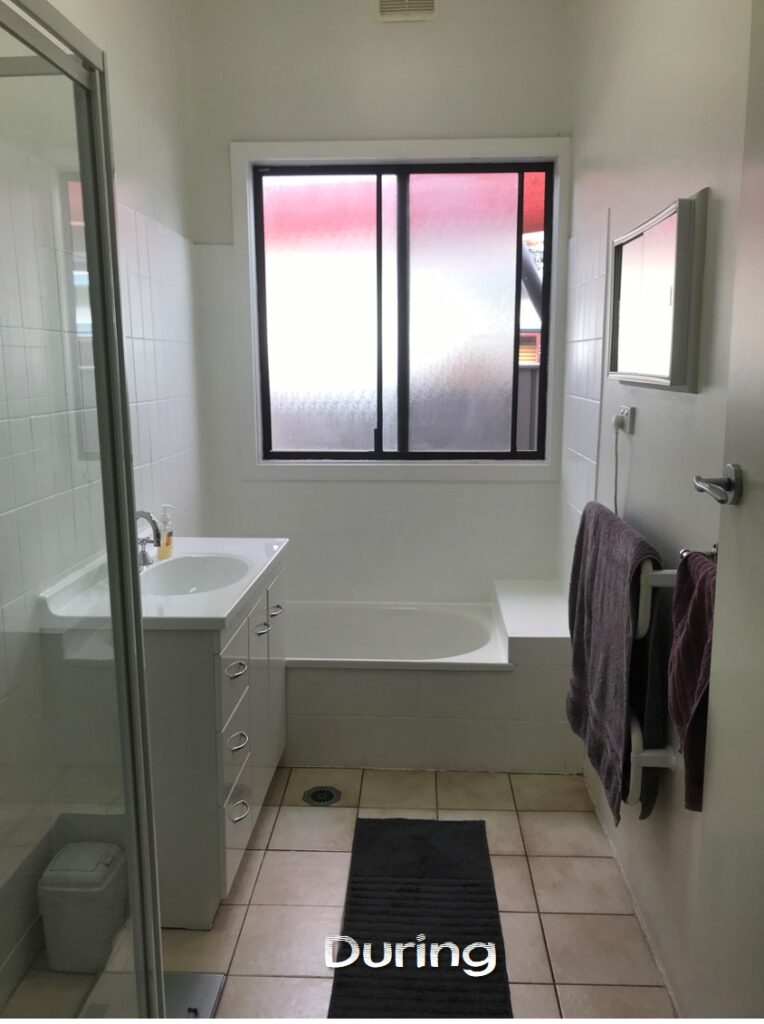
This Bathroom needed an Update!
I bought the house with the Bathroom tiles painted in a deep red colour & the walls were white. The red was tired & it made the room feel really small.
So time for an update!

I plan to fully rip out & replace the whole Bathroom in a few years, so in the meantime I wanted it to look nice. So in 4 days & for only $290 I got stuck into it.
Bring on the Paint!

Dulux Renovations Range is fantastic! I used the Satin Tile Paint in Natural White (Half Strength) for the wall tiles. 1 x 1Litre can did this whole room of tiles with 2 coats.
And this is how I did it…
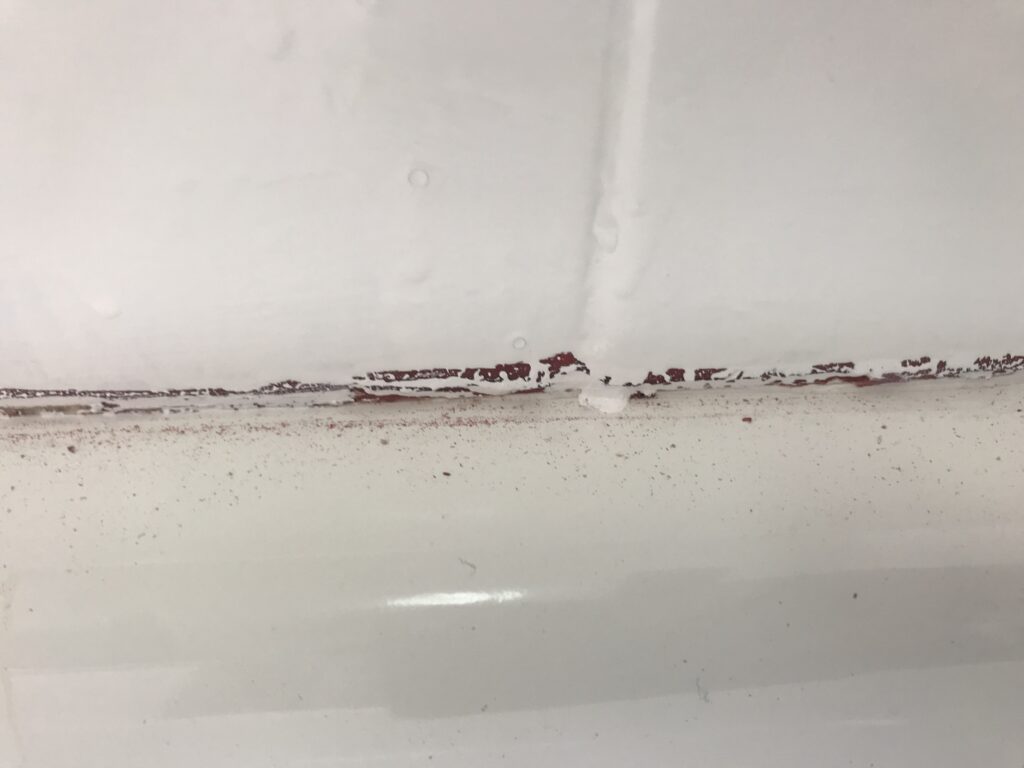
Step 1 – Use silicone remover to get rid of any silicone. The paint will not stick to it! I know, I tried! This image shows where the paint didn’t adhere to the old silicone.
Step 2 – Clean the tiles to get any residue off them (old hairspray or detergents).
Step 3 – Lightly sand the current tiles. In my case, this was the old paint on the tiles. Some of the paint came off back to the old tiles underneath. That was okay, I just sanded the paint edges of those sections to level it out & then sanded the rest. This is to give the new paint something to stick into. Wipe down walls after sanding to get dust off. And then…
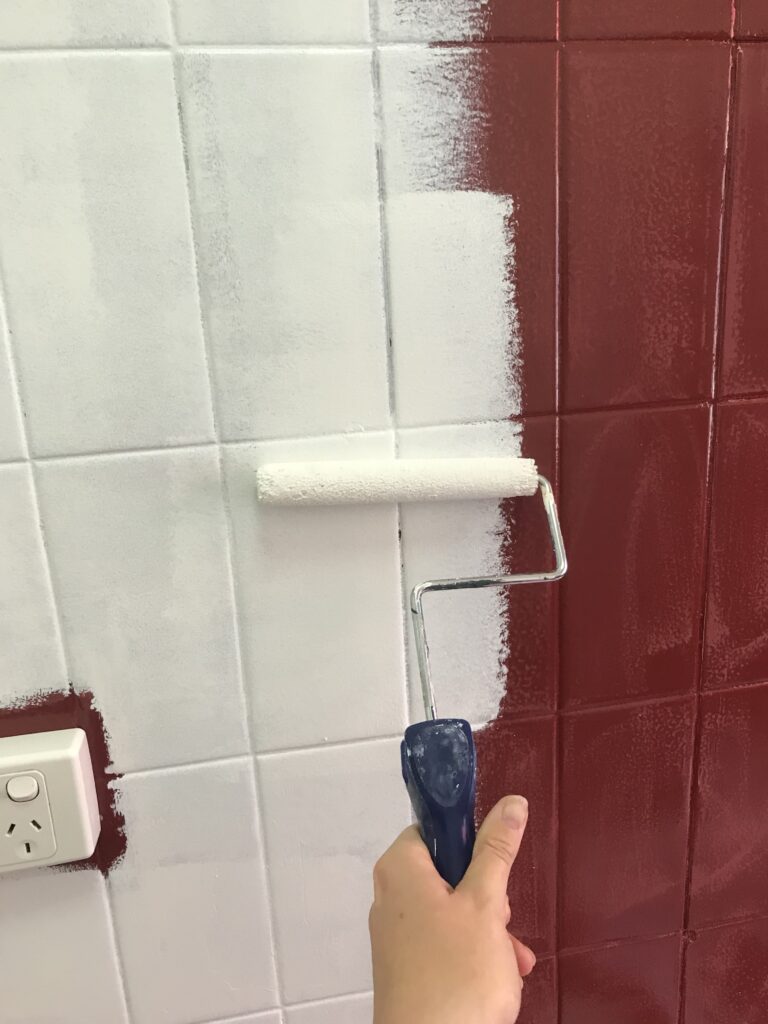
Step 4 – The fun part – PAINT! I used the Dulux Renovations Tile Paint ($70) with a ‘nook & cranny’ roller frame with a 4mm nap sleeve. They are easy to find & easier to use in smaller spaces like this. Your first coat may look see-through, that’s okay, it needs at least 2 coats to cover, leaving the appropriate time in between.
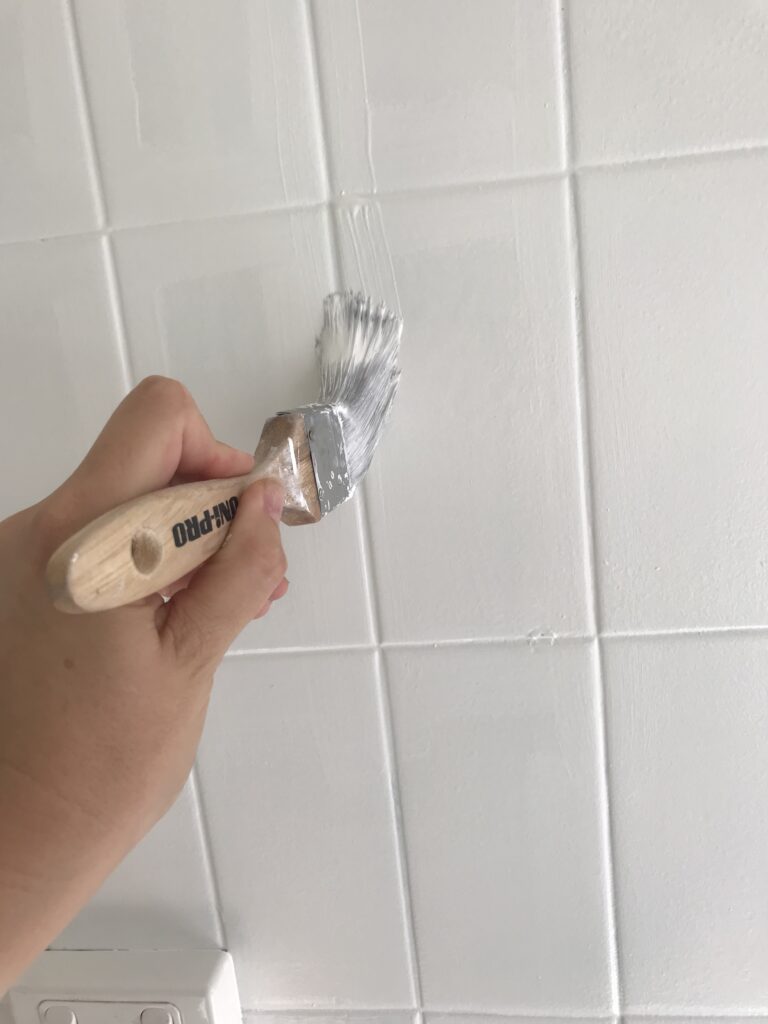
Step 5 – After the paint is done, re-silicone the water tightness areas. As I painted in Natural White Half Strength (almost stark white) it made it easy to use white silicone for a cleaner finish. Leave appropriate time before use afterwards.


Step 6 – The white Bathroom was great, but I wanted colour, so I painted the walls above. I did this room in Dulux Bayleaf. I used just over 2 Litres of paint for 2 coats of the whole room (4 Litres cost $70). It dried quickly, so I was able to do a recoat after only 8 hours.

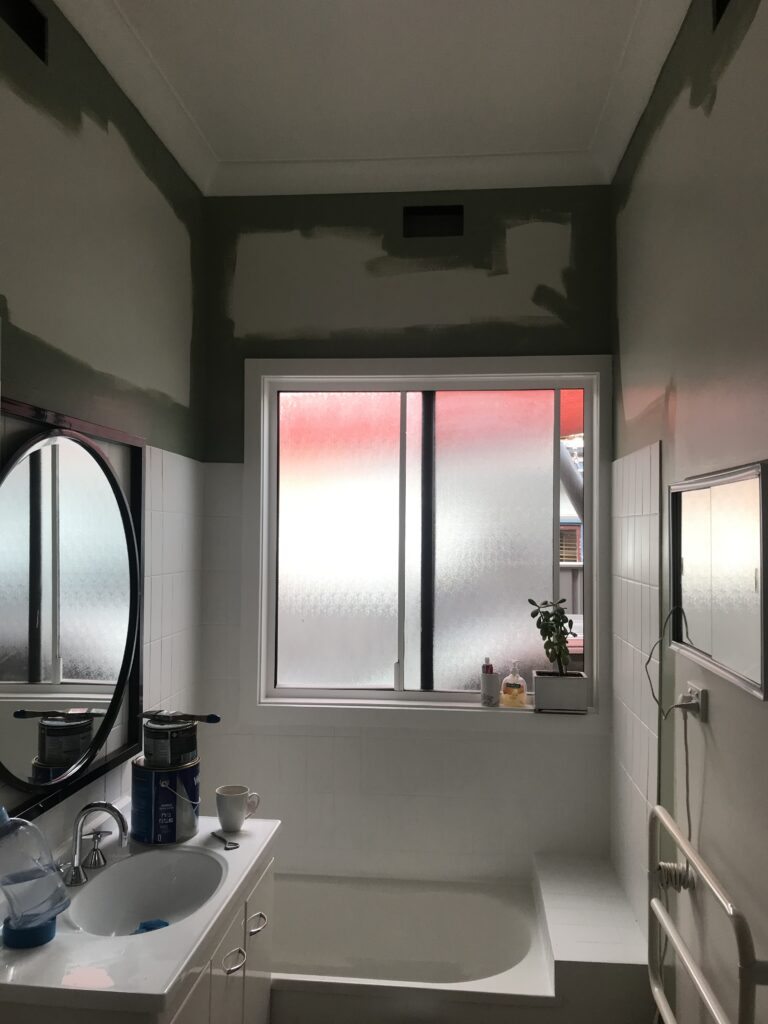
Step 7 – Mirror. I picked this mirror up second hand (for $100) on Facebook Marketplace. Drilled the holes through the tiles where required. Note – best when drilling through tiles to put tape over the spot, punch a hole with a nail first before trying to drill in. This helps prevent the tiles from cracking. I also use tape to catch the drilling mess too!


Step 8 – Relax… & have a bath!
At the last minute I popped out the vents & spray painted them in black satin (because I had it in the shed) & they look fresh & modern. They were a bit yellow. So now I am still planning another change which is replacing the main light with a black pendant but that can wait. Overall I am so happy! I made great use of the long Australia Day weekend. It looks amazing & if I get sick of the green I can easily paint it in blue, or mustard or neutral & the wall tiles will still be great.
Budget Breakdown –
- $70 for Renovations Tile Paint
- $70 for Green Wall Paint
- $100 for second hand Mirror
- $50 for Silicone Remover, New Silicone, Roller Frame & Sleeve, Brush, etc.
- An absolute Bargain!
DIY notes to remember –
- Safety is key! Bathrooms have sloped flooring to help with water flow. If you are using a ladder you must be careful with this. I also had towels & bathmats under the ladder feet to stop them from scratching the bathtub.
- The finish will be DIY. No matter how great you may be at painting, there is a reason why professionals charge so much. It’s in the finishing. You may have brush strokes, dribbles or bubbles in the paintwork, luckily this paint levels out pretty well when drying for a good look. Also if any of your tiles are cracked beforehand, they are still cracked afterwards, just coated. But I admit – it still looks heaps better!
- The room will smell for a couple of days. If you have children or sensitivities to paint, then close the door & leave the exhaust fan on. Luckily all of these paints are water-based (acrylic) & wash up in water. That makes it much less smelly.
- Read & Research. Sounds boring – but you’re doing it right now!! Just read the directions of the products before you use them. 5 minutes of reading will prevent 5 hours of sanding. Also look for tips to help the process – like spraying dishwashing liquid on silicone to work it, or my drilling into tiles tape, stuff like that.
- Have a basic plan but be ready for changes. I had no idea what mirror I wanted before I started, & was happy when I found this one second hand.
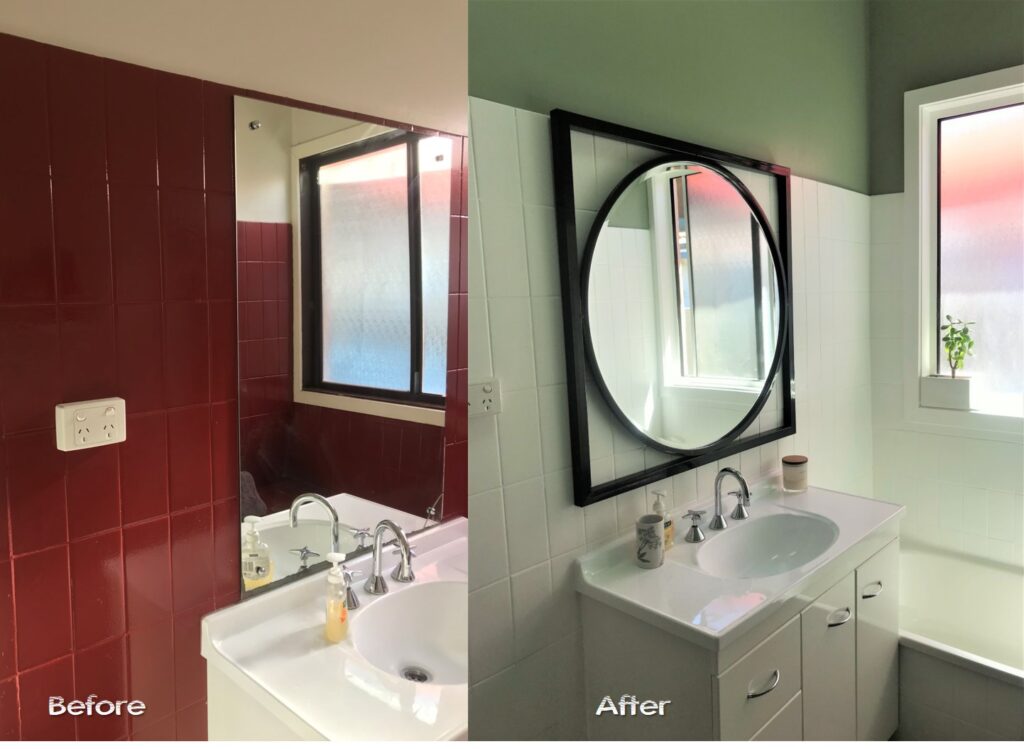


As you can see – so much nicer!
Time to start planning your next project!
Do you get stuck with colours? Click here for Colour Advice.
Are you thinking a paint job wont be enough for your Bathroom? Is it going to be a full rip out & re-do? Click here for more information.
You can also find me on my socials for the latest projects –https://www.facebook.com/MystereeDesigns https://www.instagram.com/mysteree_designs/